2. 文字识别
借着昨天的写.昨天的进度是顺利的将文字进行了分割,接下来的部分将是识别.
先说一点就是每一天的任务完成后,没有特殊情况,文章的内容便不再进行改动,以此达到记录的目的.
今天在观察时发现了一点疏漏,在这里说明一下.主要内容就是文字的内容在一定程度上是共享的.我们拿两个字来举例说明.
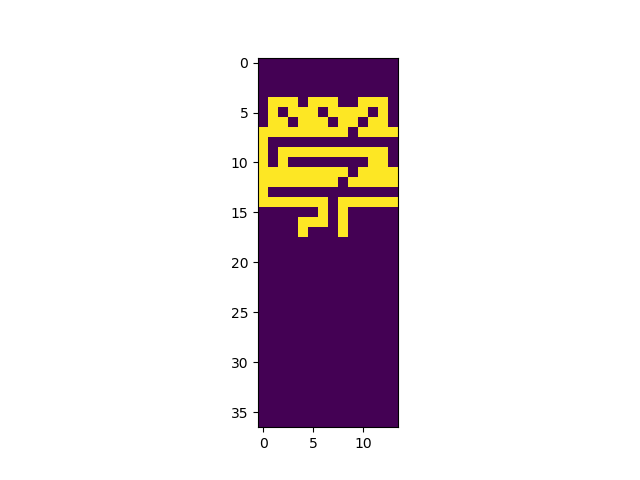
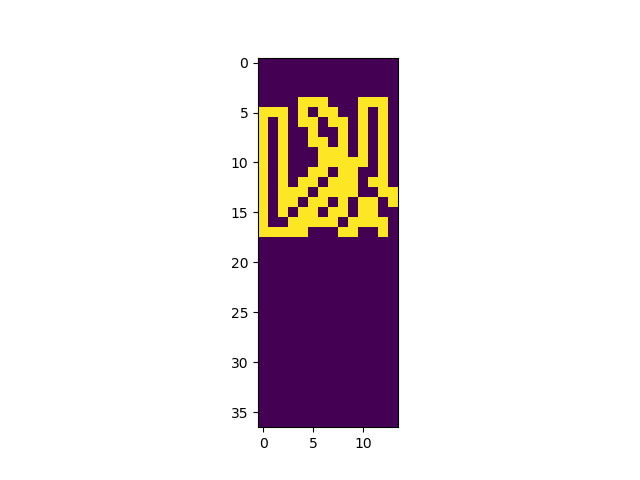
观察可以得到,“学”字和“以”字的右边和左边重合了.但是在写这句话的时候,突然意识到这一点似乎并不重要,只要按照一定的标准统一就可以,无需刻意.也就是说,我认定这是什么就是什么,和我定义的相同即可.
2.1 识别方法
那么接下来就进入正题,开始文字识别的方法部分.这一部分可以有多种思路,首先能想到的就是用Tensorflow撺一个多层感知器,用最简单的神经网络就足以做到精准识别.这是思路一.但是这么规整统一的样本真的需要这么复杂的识别方式么?因此这里就有了思路二,简单实用的方法.余弦相似度应该就可以很好的完成任务.或者直接计算两个向量的欧氏距离即可.第二种方法中的两个变种的精确性将在之后有更进一步的数据后进行验证,但考虑到余弦相似性已经很快,而且比较直接计算距离在理论上更加复杂一点点(当然只是一点点).下面还是简单介绍一下余弦相似的理论[1].
余弦相似性通过测量两个向量的夹角的余弦值来度量它们之间的相似性。0度角的余弦值是1,而其他任何角度的余弦值都不大于1;并且其最小值是-1。从而两个向量之间的角度的余弦值确定两个向量是否大致指向相同的方向。两个向量有相同的指向时,余弦相似度的值为1;两个向量夹角为90°时,余弦相似度的值为0;两个向量指向完全相反的方向时,余弦相似度的值为-1。这结果是与向量的长度无关的,仅仅与向量的指向方向相关。余弦相似度通常用于正空间,因此给出的值为0到1之间。
2.1.1 余弦相似性的定义
两个向量间的余弦值可以通过使用欧几里得点积公式求出:

给定两个属性向量,A和B,其余弦相似性θ由点积和向量长度给出,如下所示:

给出的相似性范围从-1到1:-1意味着两个向量指向的方向正好截然相反,1表示它们的指向是完全相同的,0通常表示它们之间是独立的,而在这之间的值则表示中间的相似性或相异性。
到这里识别的部分基本说完了,现在没有办法再进行下去是因为现在系统还没有完全跑起来,很多实际的问题还没有遇到,只有在跑程序的过程中才可以发现问题,进行测试和优化. 因此我们接下来转向第三个问题,也就是控制,因为这个自动执行的程序的交互式靠点击完成的,所以交互也是一个很重要的环节.
3. 交互
3.1 pyautogui
]查阅了相关资料后,由于这些库都没有使用过,就先用pyautogui来试试手. 安装部分很简单,在anaconda环境管理里没有找到,直接用pip安装就可以了
pip install pyautogui
3.2 获取屏幕分辨率
依赖的库有点多,安装起来稍微花了点时间.使用起来也不算太难,下面简单介绍一下.既然要控制鼠标,那么我们需要知道屏幕的大小,才能定位.pyautogui提供了这样的库来的到当前屏幕的分辨率.
pyautogui.size()
但是问题来,返回的结果我看不懂了,
Size(width=1280, height=800)
我的电脑屏幕明明是2560x1600的分辨率,外接屏幕也是1600x900,那么为什么会返回这么一个结果呢.(这时的我还不知道为什么).那么接下来要做两件事,一个是在我的surface book2检验返回的结果是否正确,另一个就是查查官方文档.
Locations on your screen are referred to by X and Y Cartesian coordinates. The X coordinate starts at 0 on the left side and increases going right. Unlike in mathematics, the Y coordinate starts at 0 on the top and increases going down.
0,0       X increases -->
+---------------------------+
|                           | Y increases
|                           |     |
|   1920 x 1080 screen      |     |
|                           |     V
|                           |
|                           |
+---------------------------+ 1919, 1079
The pixel at the top-left corner is at coordinates 0, 0. If your screen’s resolution is 1920 x 1080, the pixel in the lower right corner will be 1919, 1079 (since the coordinates begin at 0, not 1).
The screen resolution size is returned by the size() function as a tuple of two integers. The current X and Y coordinates of the mouse cursor are returned by the position() function.
单看这个文档看不出什么端倪,我把外接显示器拔掉也是一样的结果,那么现在只能尝试在Windows上使用了.
经过测试,在windows上是没有问题的,显示分辨率3240x2160.也不知道是为什么,在OSX上就是有问题,暂时先不管这个问题,因为最后还是要在windows环境下跑的.
3.3 要用到的方法
接下来介绍一下主要使用的几个函数.
Mouse Movement
>>> pyautogui.moveTo(100, 200)   # moves mouse to X of 100, Y of 200.
>>> pyautogui.moveTo(None, 500)  # moves mouse to X of 100, Y of 500.
>>> pyautogui.moveTo(600, None)  # moves mouse to X of 600, Y of 500.
用法很简单,输入X和Y的坐标即可.有一点要说的是None这个参数的意思是传入鼠标当前位置的X或Y值.正常来说,如果单单是用MoveTo的话,鼠标会立刻移动到指定坐标,如果我们希望这个过程是gradually的,那么就需要另外一个参数,duration,这个单位默认是秒,例如
>>> pyautogui.moveTo(100, 200, 2) # moves mouse to X of 100, Y of 200 over 2 seconds
底下有个注意事项,为了方便起见,我就不翻译了,直接粘过来,非常简单.
(If the duration is less than pyautogui.MINIMUM_DURATION the movement will be instant. By default, pyautogui.MINIMUM_DURATION is 0.1.)
还有一种移动方式算是相对移动.
>>> pyautogui.moveTo(100, 200)  # moves mouse to X of 100, Y of 200.
>>> pyautogui.move(0, 50)       # move the mouse down 50 pixels.
>>> pyautogui.move(-30, 0)      # move the mouse left 30 pixels.
>>> pyautogui.move(-30, None)   # move the mouse left 30 pixels.
Mouse Drags
>>> pyautogui.dragTo(100, 200, button='left')     # drag mouse to X of 100, Y of 200 while holding down left mouse button
>>> pyautogui.dragTo(300, 400, 2, button='left')  # drag mouse to X of 300, Y of 400 over 2 seconds while holding down left mouse button
>>> pyautogui.drag(30, 0, 2, button='right')   # drag the mouse left 30 pixels over 2 seconds while holding down the right mouse button
简单来说,这个用法和Mouse Movement很接近,MoveTo和Move分别对应DragTo和Drag,参数也大体相同.由于是drag,有了鼠标的三个键,left,middle和right.
Mouse Clicks
The click() function simulates a single, left-button mouse click at the mouse’s current position. A “click” is defined as pushing the button down and then releasing it up. For example:
>>> pyautogui.click() # click the mouse
click()直接点击鼠标.
To combine a moveTo() call before the click, pass integers for the x and y keyword argument:
>>> pyautogui.click(x=100, y=200) # move to 100, 200, then click the left mouse button.
To specify a different mouse button to click, pass ‘left’, ‘middle’, or ‘right’ for the button keyword argument:
>>> pyautogui.click(button='right') # right-click the mouse
To do multiple clicks, pass an integer to the clicks keyword argument. Optionally, you can pass a float or integer to the interval keyword argument to specify the amount of pause between the clicks in seconds. For example:
>>> pyautogui.click(clicks=2)  # double-click the left mouse button
>>> pyautogui.click(clicks=2, interval=0.25)  # double-click the left mouse button, but with a quarter second pause in between clicks
>>> pyautogui.click(button='right', clicks=3, interval=0.25)  ## triple-click the right mouse button with a quarter second pause in between clicks
As a convenient shortcut, the doubleClick() function will perform a double click of the left mouse button. It also has the optional x, y, interval, and button keyword arguments. For example:
>>> pyautogui.doubleClick() # perform a left-button double click
There is also a tripleClick() function with similar optional keyword arguments.
The rightClick() function has optional x and y keyword arguments.
The mouseDown() and mouseUp() Functions Mouse clicks and drags are composed of both pressing the mouse button down and releasing it back up. If you want to perform these actions separately, call the mouseDown() and mouseUp() functions. They have the same x, y, and button. For example:
>>> pyautogui.mouseDown(); pyautogui.mouseUp()  # does the same thing as a left-button mouse click
>>> pyautogui.mouseDown(button='right')  # press the right button down
>>> pyautogui.mouseUp(button='right', x=100, y=200)  # move the mouse to 100, 200, then release the right button up.
Mouse Scrolling
The mouse scroll wheel can be simulated by calling the scroll() function and passing an integer number of “clicks” to scroll. The amount of scrolling in a “click” varies between platforms. Optionally, integers can be passed for the the x and y keyword arguments to move the mouse cursor before performing the scroll. For example:
>>> pyautogui.scroll(10)   # scroll up 10 "clicks"
>>> pyautogui.scroll(-10)  # scroll down 10 "clicks"
>>> pyautogui.scroll(10, x=100, y=100)  # move mouse cursor to 100, 200, then scroll up 10 "clicks"
On OS X and Linux platforms, PyAutoGUI can also perform horizontal scrolling by calling the hscroll() function. For example:
>>> pyautogui.hscroll(10)   # scroll right 10 "clicks"
>>> pyautogui.hscroll(-10)   # scroll left 10 "clicks"
The scroll() function is a wrapper for vscroll(), which performs vertical scrolling.
无耻的复制粘贴了,主要在于里面的内容并不难,所以不需要浪费时间.以上就是鼠标的主要操作,涵盖了移动,点击,拖拽,这已经做够满足我们的使用需求了.
那么接下来需要写一点键盘操作的部分,在这里键盘并不是主角,但是也会用到,比如跟人物对话会用到“F”键.
Key Control Functions
The write() Function The primary keyboard function is write(). This function will type the characters in the string that is passed. To add a delay interval in between pressing each character key, pass an int or float for the interval keyword argument.
For example:
>>> pyautogui.write('Hello world!')                 # prints out "Hello world!" instantly
>>> pyautogui.write('Hello world!', interval=0.25)  # prints out "Hello world!" with a quarter second delay after each character
You can only press single-character keys with write(), so you can’t press the Shift or F1 keys, for example.
The press(), keyDown(), and keyUp() Functions To press these keys, call the press() function and pass it a string from the pyautogui.KEYBOARD_KEYS such as enter, esc, f1. See KEYBOARD_KEYS.
For example:
>>> pyautogui.press('enter')  # press the Enter key
>>> pyautogui.press('f1')     # press the F1 key
>>> pyautogui.press('left')   # press the left arrow key
The press() function is really just a wrapper for the keyDown() and keyUp() functions, which simulate pressing a key down and then releasing it up. These functions can be called by themselves. For example, to press the left arrow key three times while holding down the Shift key, call the following:
>>> pyautogui.keyDown('shift')  # hold down the shift key
>>> pyautogui.press('left')     # press the left arrow key
>>> pyautogui.press('left')     # press the left arrow key
>>> pyautogui.press('left')     # press the left arrow key
>>> pyautogui.keyUp('shift')    # release the shift key
To press multiple keys similar to what write() does, pass a list of strings to press(). For example:
>>> pyautogui.press(['left', 'left', 'left'])
Or you can set how many presses left:
>>> pyautogui.press('left', presses=3)
To add a delay interval in between each press, pass an int or float for the interval keyword argument.
The hotkey() Function To make pressing hotkeys or keyboard shortcuts convenient, the hotkey() can be passed several key strings which will be pressed down in order, and then released in reverse order. This code:
>>> pyautogui.hotkey('ctrl', 'shift', 'esc')
…is equivalent to this code:

>>> pyautogui.keyDown('ctrl')
>>> pyautogui.keyDown('shift')
>>> pyautogui.keyDown('esc')
>>> pyautogui.keyUp('esc')
>>> pyautogui.keyUp('shift')
>>> pyautogui.keyUp('ctrl')
To add a delay interval in between each press, pass an int or float for the interval keyword argument.
KEYBOARD_KEYS The following are the valid strings to pass to the press(), keyDown(), keyUp(), and hotkey() functions:
['\t', '\n', '\r', ' ', '!', '"', '#', '$', '%', '&', "'", '(',
')', '*', '+', ',', '-', '.', '/', '0', '1', '2', '3', '4', '5', '6', '7',
'8', '9', ':', ';', '<', '=', '>', '?', '@', '[', '\\', ']', '^', '_', '`',
'a', 'b', 'c', 'd', 'e','f', 'g', 'h', 'i', 'j', 'k', 'l', 'm', 'n', 'o',
'p', 'q', 'r', 's', 't', 'u', 'v', 'w', 'x', 'y', 'z', '{', '|', '}', '~',
'accept', 'add', 'alt', 'altleft', 'altright', 'apps', 'backspace',
'browserback', 'browserfavorites', 'browserforward', 'browserhome',
'browserrefresh', 'browsersearch', 'browserstop', 'capslock', 'clear',
'convert', 'ctrl', 'ctrlleft', 'ctrlright', 'decimal', 'del', 'delete',
'divide', 'down', 'end', 'enter', 'esc', 'escape', 'execute', 'f1', 'f10',
'f11', 'f12', 'f13', 'f14', 'f15', 'f16', 'f17', 'f18', 'f19', 'f2', 'f20',
'f21', 'f22', 'f23', 'f24', 'f3', 'f4', 'f5', 'f6', 'f7', 'f8', 'f9',
'final', 'fn', 'hanguel', 'hangul', 'hanja', 'help', 'home', 'insert', 'junja',
'kana', 'kanji', 'launchapp1', 'launchapp2', 'launchmail',
'launchmediaselect', 'left', 'modechange', 'multiply', 'nexttrack',
'nonconvert', 'num0', 'num1', 'num2', 'num3', 'num4', 'num5', 'num6',
'num7', 'num8', 'num9', 'numlock', 'pagedown', 'pageup', 'pause', 'pgdn',
'pgup', 'playpause', 'prevtrack', 'print', 'printscreen', 'prntscrn',
'prtsc', 'prtscr', 'return', 'right', 'scrolllock', 'select', 'separator',
'shift', 'shiftleft', 'shiftright', 'sleep', 'space', 'stop', 'subtract', 'tab',
'up', 'volumedown', 'volumemute', 'volumeup', 'win', 'winleft', 'winright', 'yen',
'command', 'option', 'optionleft', 'optionright']
最后总结一下,今天的内容没有什么难点,主要是交互部分,没有复杂的逻辑和方法,文档的很多地方都是直接copy官方文档,主要难点在于整合和精准控制.今天就到这里吧,我们明天再见.另外说一句,明天的目标是将现有的模块进行整合,跑一个简单的脚本,脚本内容暂定为能够独立完成一个简单任务的交付,也就是我已经手动接了一个任务,可以自动点击,在寻路完毕后交付任务或正常与NPC对话.也就是完成一个完整任务的其中一个环节,无论他是接任务还是交任务.